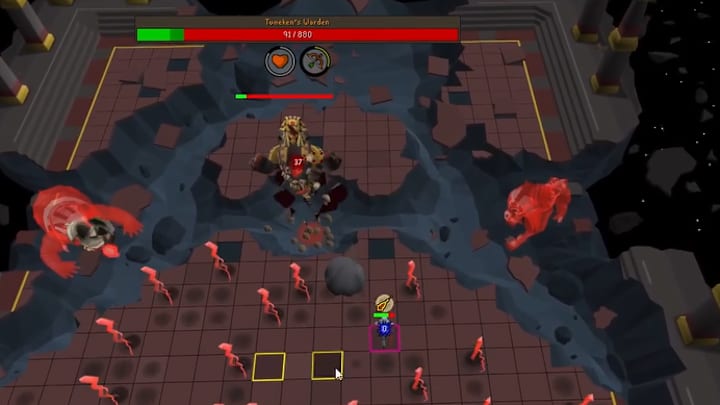
No. 1 - Elidinis'/Tumeken’s Warden
There is no debate here, as this unique two-in-one final boss is by far the most challenging encounter of Tombs of Amascut and is the most likely fight to delay your journey to receiving an Elidinis Thread.
While attacking the obelisk to start off, it is recommended to stand on the east side of it to block the transfer to disrupt the charging of Tumeken’s Warden so that the final phase fight is against Tumeken’s and therefore you face the phantoms of Zebak and Ba-Ba, rather than Akkha and Kephri. Once the obelisk reaches zero health, the second phase begins.
The Warden prays against two of three combat styles, and this changes during the fight, so you will need to switch gear accordingly. You will also need to switch prayers between Protect from Ranged and Protect from Magic, depending on which color skull (red is Magic) he fires at you.
When he disables your overhead prayers, you will need to react quickly to whatever he throws at you and pray against it: red scimitar (Melee), white arrow (Ranged) or blue spell (Magic). Also, avoid the dark-colored projectile to avoid being imprisoned.
The obelisk can also attack you during this phase of the fight, either with a converging beam, a windmill beam, or a lightning skull. These attacks are indicated by the color of the lightning surrounding the obelisk: red, orange, and yellow, respectively.
Every time you throw the Warden off balance by filling up his yellow damage bar, he will eject his core, which will need to be damaged as much as possible before he pulls it back in. This phase continues until the core is depleted.
Even on a low raid level, the third phase of this fight, specifically the latter stages of it, can be absolutely chaotic, from regular movement to prayer switches to dodging flying objects from the sub-bosses.
The first part is fairly simple; don’t stand where the new Warden shakes the ground. Stand one tile west of center, then one tile east of center, then center, and repeat. When the energy siphons are spawned, defeat them as quickly as possible to do extra damage to the boss, which also prevents an explosive shockwave.
During the second energy siphon spawn, the first phantom will spawn east. If you’re fighting Tumeken’s Warden, this would be Zebak, and you will have to avoid his attacks as well by switching between protecting from ranged and magic. During the third energy siphon spawn, the second phantom, Ba-Ba, will spawn east. You must now also dodge the boulder.
If you’re fighting Elidinis’ Warden, the first phantom would be Akkha’s, and you will also need to switch between protecting against ranged and magic. The second would be Kephri’s, and you will need to avoid the fireball.
During the enrage phase, which starts when the boss heals from 5% to 20% health, tiles are torn from the arena, limiting your ability to move around, and you must now avoid the attacks of both phantoms, plus the lightning strikes, which are indicated by shadows on the floor. Again, even without any invocations, this can be sheer chaos.
